Optional check in due on Wednesday 1 April (Week 1) at 11:59 PM
In this class, we’ll be using R and RStudio to code up our statistical analyses. Walk through these steps to make sure you have both programs on your computer and that everything is working properly. You need to make sure all tasks are completed before workshop on Friday.
At minimum, you need to have read through and completed tasks 1-8 (modifications for Jupyter instance below). If you want to submit the optional check-in for An to verify that you’ve done things correctly, you can do task 9 and submit your screenshots on Canvas.
If you do not have R, RStudio, and Quarto installed and running, we will not stop for you. Do the set up steps before class starts!
Follow steps 2 and 3 in the resource on using the virtual machine.
For set up, you will have to come back here and complete task 5.
You should have at least R 4.2.2 (released November 2022) and RStudio 2023.12.1.
If you have downloaded R/RStudio previously but you don’t have updated versions, then you need to update! To do so, follow the instructions for installation in Task 1.
An will be using R version 4.5.2 and RStudio version 2026.01.0+392.
First of all, take a deep breath. If you are new to setting things up on your computer, many of these steps may be unfamiliar to you.
Give yourself enough time to get stuck and ask for help from an actual human being (anyone on the instructional team).
As you are going through the set up steps, read each step carefully and follow the directions as described.
If you need a better look at a screenshot, click on the image to make it bigger.
Task 1. Set up a folder for class materials
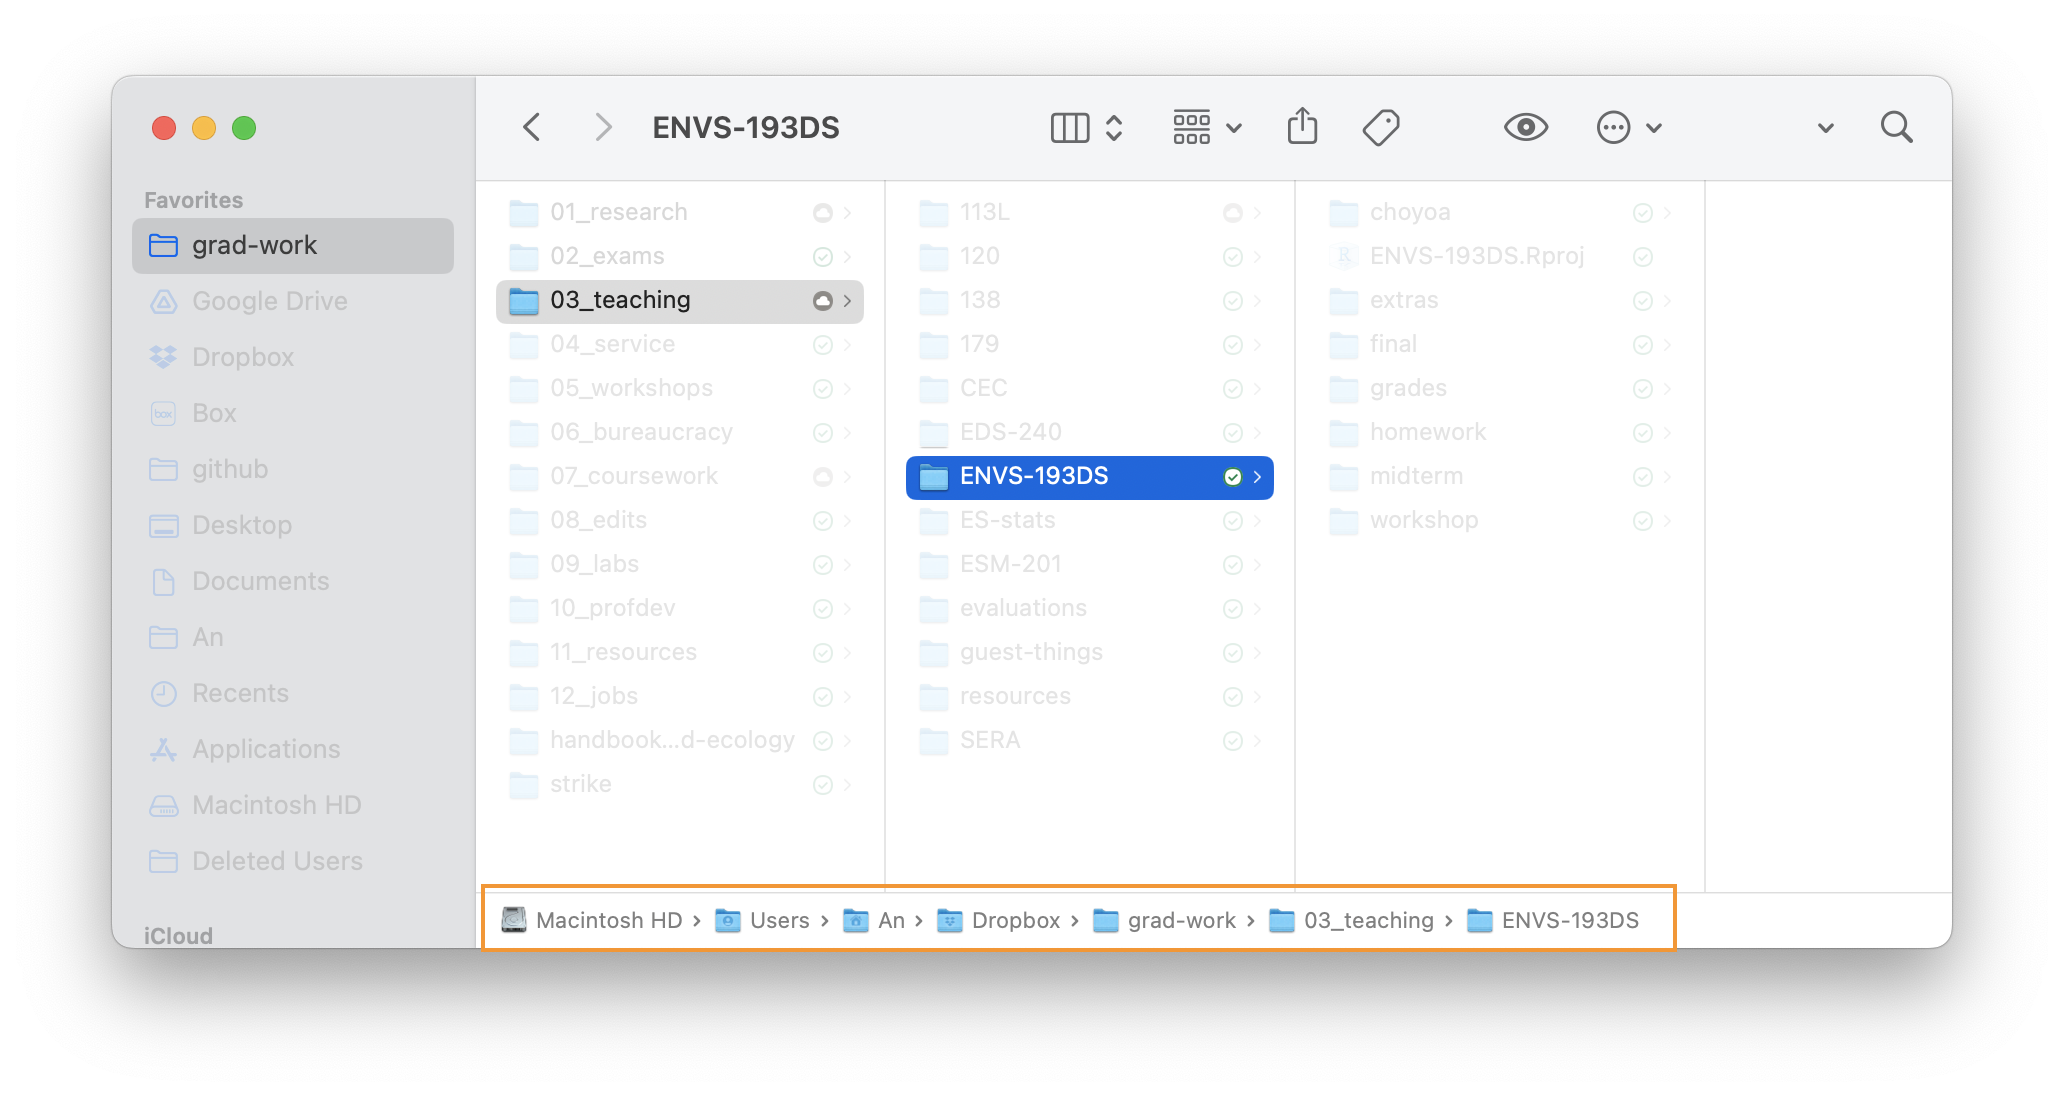
Using R/RStudio requires you to know how your computer is organized and where your files are. For now, we’ll want to set up a folder in your computer called ENVS-193DS (note no spaces in the folder name).
All operating systems are different, but make sure that your folder is not in the “iCloud”, “OneDrive”, or “Google Drive” folders in your computer. Basically, you want to be sure that you can get from your “root” directory (i.e. your actual computer hard drive) to the folder you’re using.
You can check this using the file path, or the folders you would need to open to get to the folder called ENVS-193DS. One example for MacOS is below, where the file path is shown at the bottom of the pane:
The easiest way to know where a file or folder is on your computer is to show the file path.
If you are using Mac OS, see these directions under “Show the path to a file or folder” to display the file path in the Finder window.
If you are using Windows 10 or 11, see this video with directions to show the file path in File Explorer.
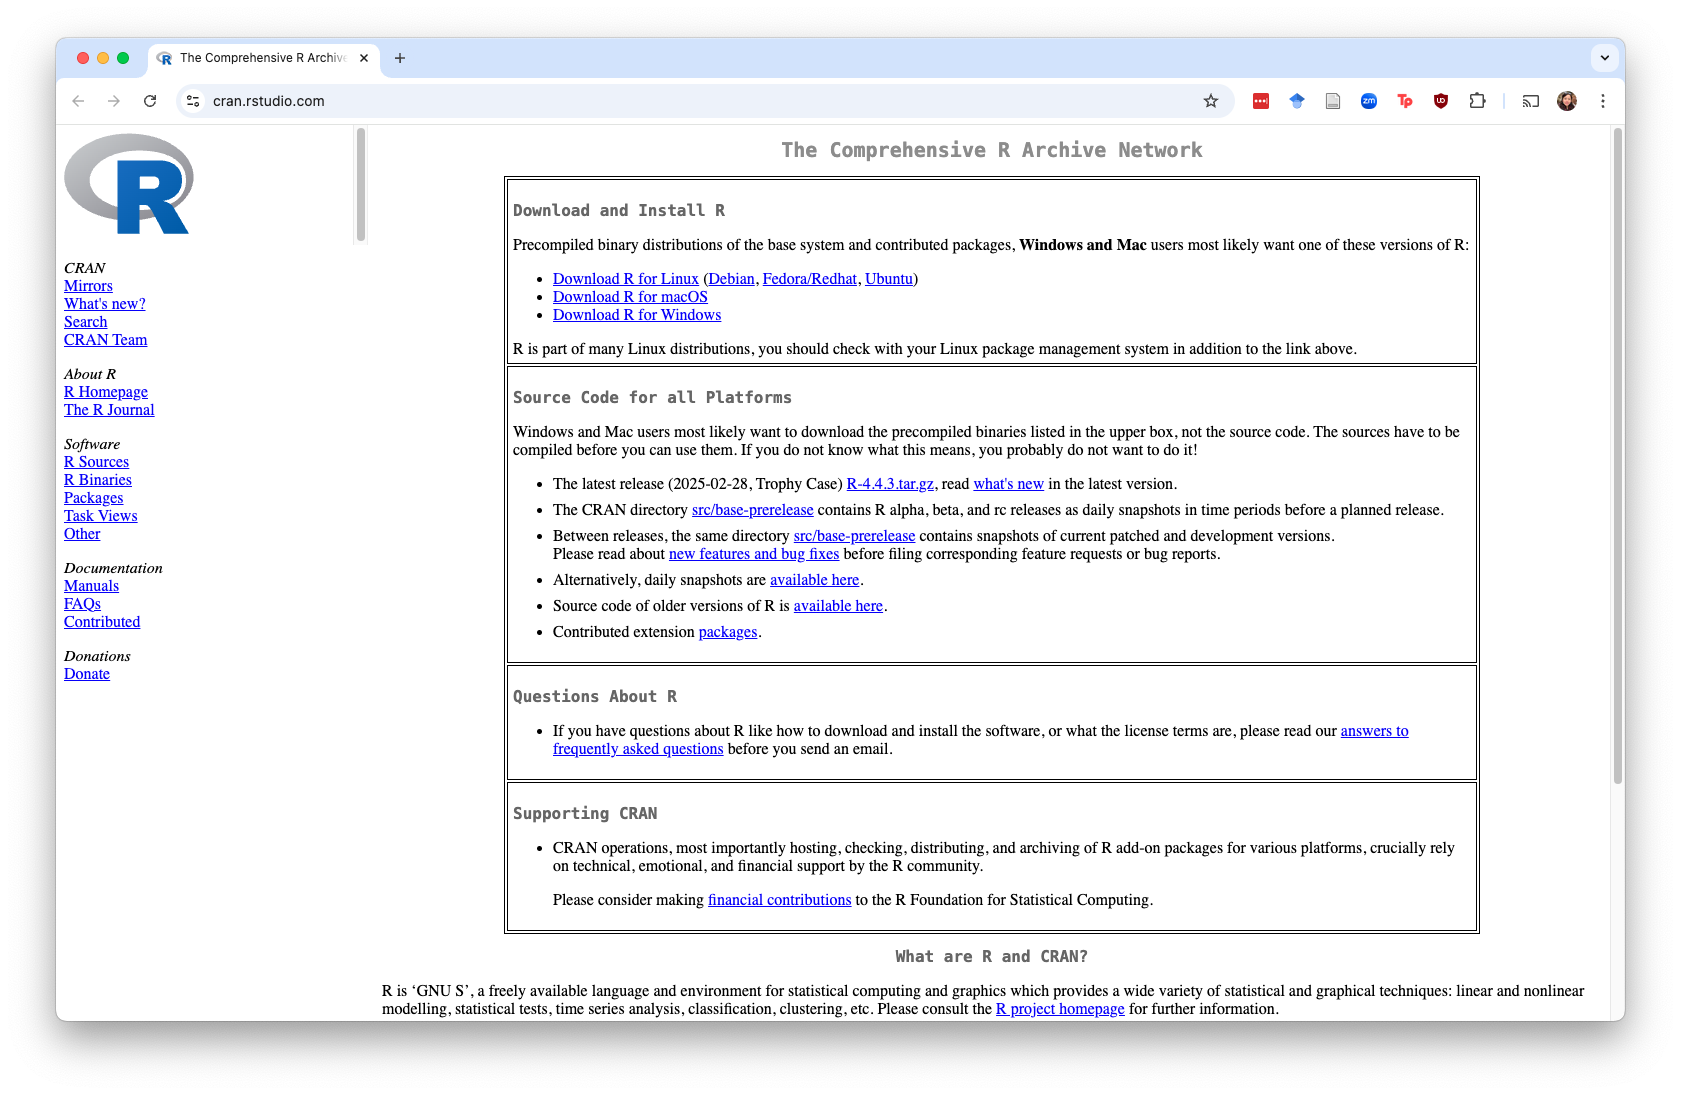
Task 2. Install R.
Go to cran.rstudio.com. Choose the correct download for your operating system!
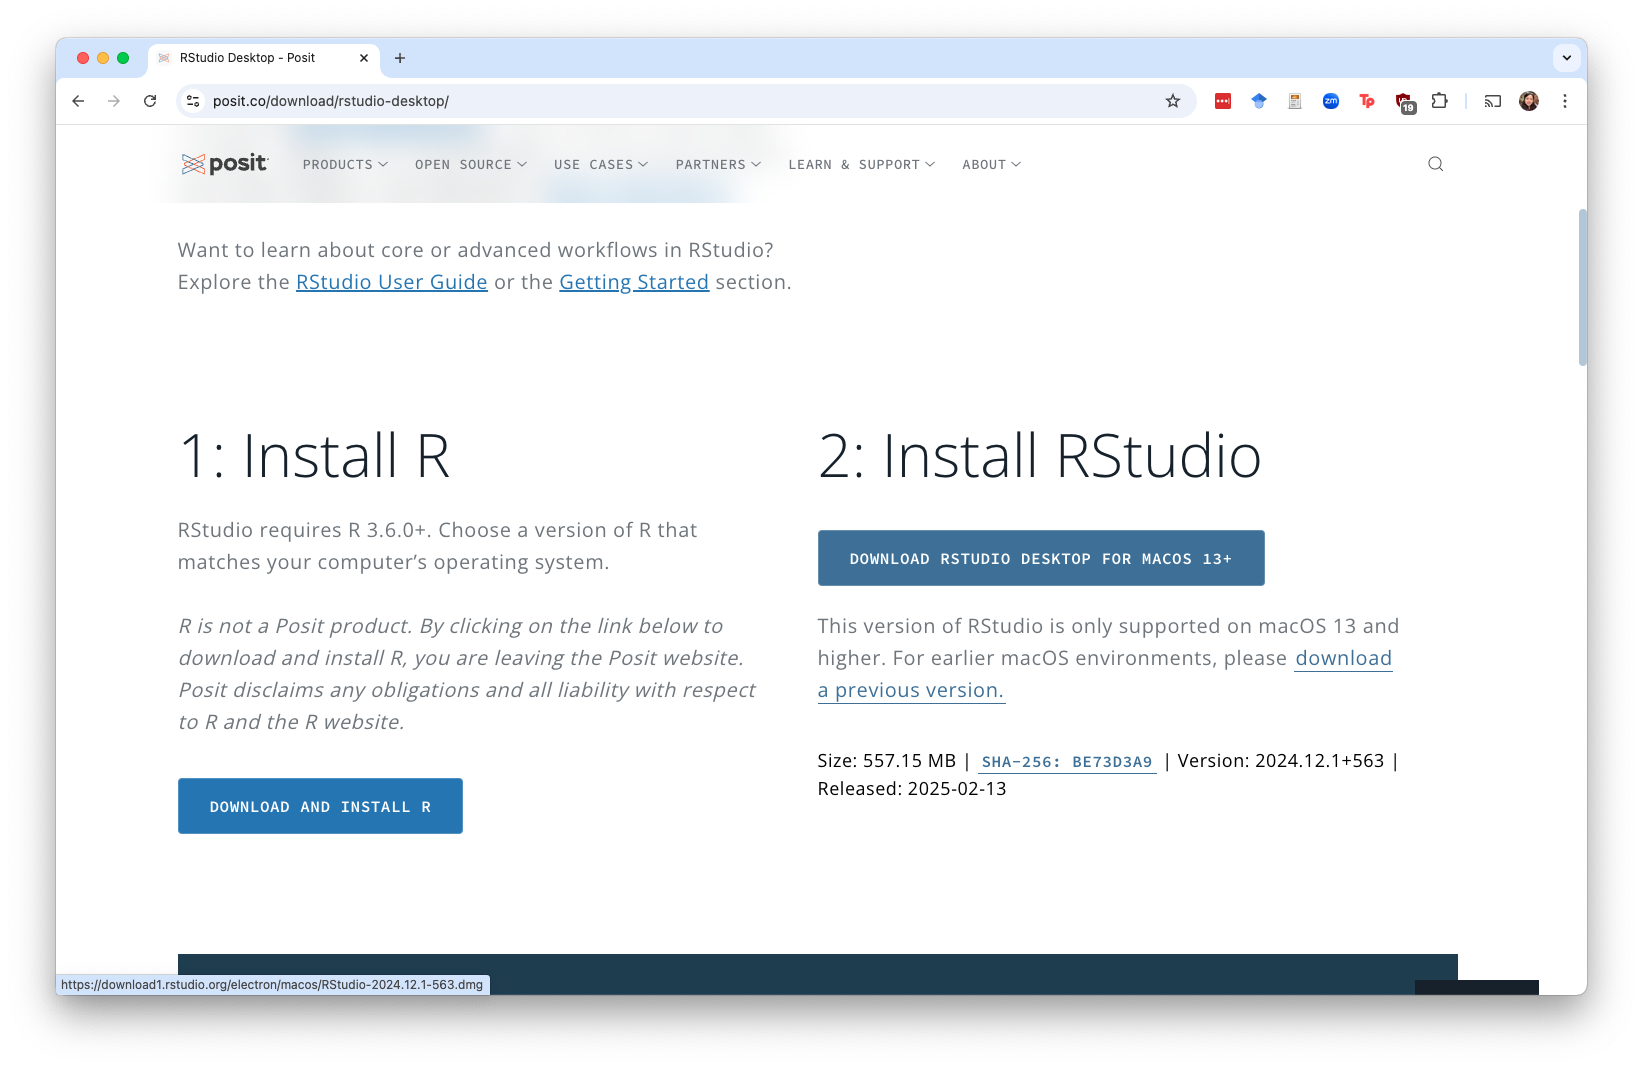
Task 3. Install RStudio (and optionally Quarto)
Go to posit.co/download/rstudio-desktop. Click on the button under “2: Install RStudio”. It should automatically show the correct version for your operating system.
You only need to install Quarto if you are running RStudio version 2022.07.1 or earlier. If you are installing a later version of RStudio, you do not need to install Quarto.
Follow the instructions for installing Quarto here.
I (An) recommend that you install an new version of RStudio instead of installing Quarto, if it is possible on your computer.
If you cannot install Quarto on your computer (because it doesn’t work with your operating system, etc.), you may need to use the virtual machine.
Task 4. Open RStudio
When we say we’re “using R” in the class, what we’re really using is RStudio, which is a graphical user interface (GUI) for R (the language). Basically, we’re never going to open up “R”, but we’ll always open up “RStudio”.
Open RStudio on your computer.
Task 5. Change your settings
You can change some settings to make your life easier when working in RStudio. The following steps are all done in the same menu. Go to Tools > Global Options.
Change your color scheme.
You don’t have to stick with the boring RStudio color scheme! Go to Appearance and select the color scheme you want.
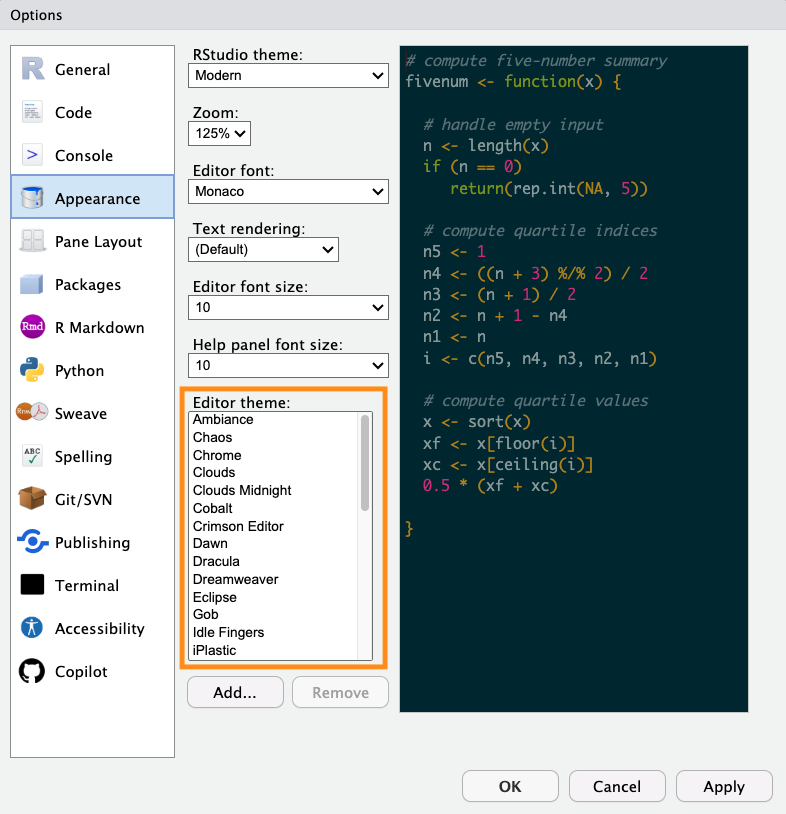
Click apply before moving on!
Change your workspace save settings.
Forming good data science habits starts from the beginning. Changing your workspace save settings will allow you to start with a clean, blank slate every time you open RStudio.
Go to the General tab. Make sure that:
- “Restore most recently opened project at startup” is unchecked
- “Restore previously open source documents at startup” is unchecked
- “Restore .Rdata into workspace at startup” is unchecked
- “Save workspace to .RData on exit” is “Never”
- “Always save history (even when not saving .RData)” is unchecked
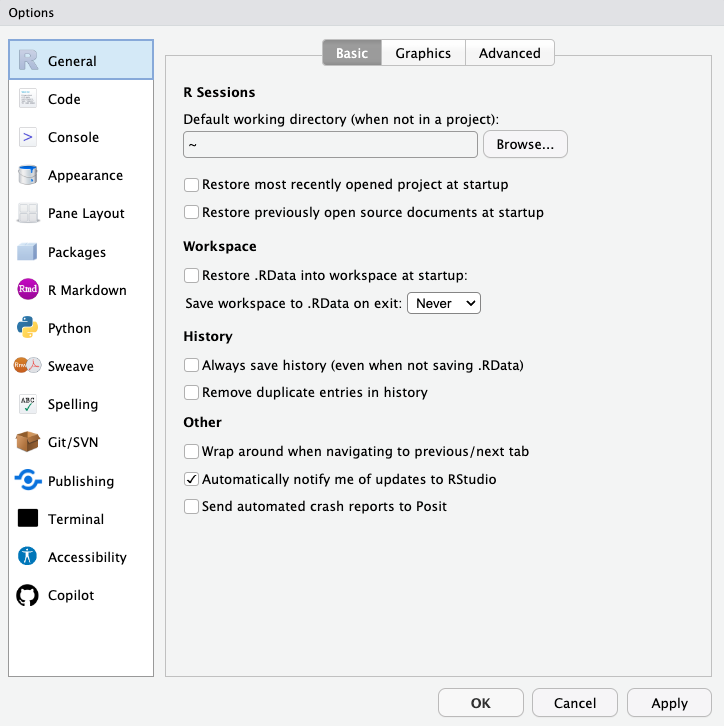
Click apply before moving on!
Change your code editing settings.
Then, go to the Code tab. Under editing, make sure:
- “Insert spaces for Tab” is checked
- “Auto-detect code indentation” is checked
- “Insert matching parens/quotes” is checked
- “Use native pipe operator, |>” is checked
- “Auto-indent code after paste” is checked
- “Vertically align arguments in auto-indent” is checked
- “Continue comment when inserting new line” is checked
- “Enable hyperlink highlighting in editor” is checked
- “Enable code snippets” is checked
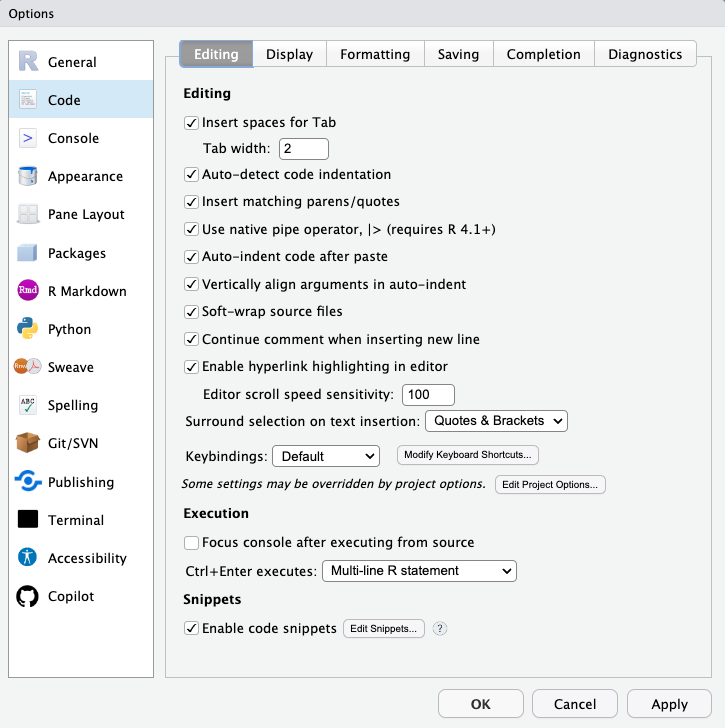
Click apply before moving on!
Change your display settings.
Then, go to Display (still under the Code tab). Make sure:
- “Highlight selected word” is checked
- “Show line numbers” is checked
- “Show margin” is checked
- “Soft-wrap source files” is checked
- “Blinking cursor” (if you want it) is checked
- “Enable preview of named and hexadecimal colors” is checked
- “Use rainbow parentheses” is checked
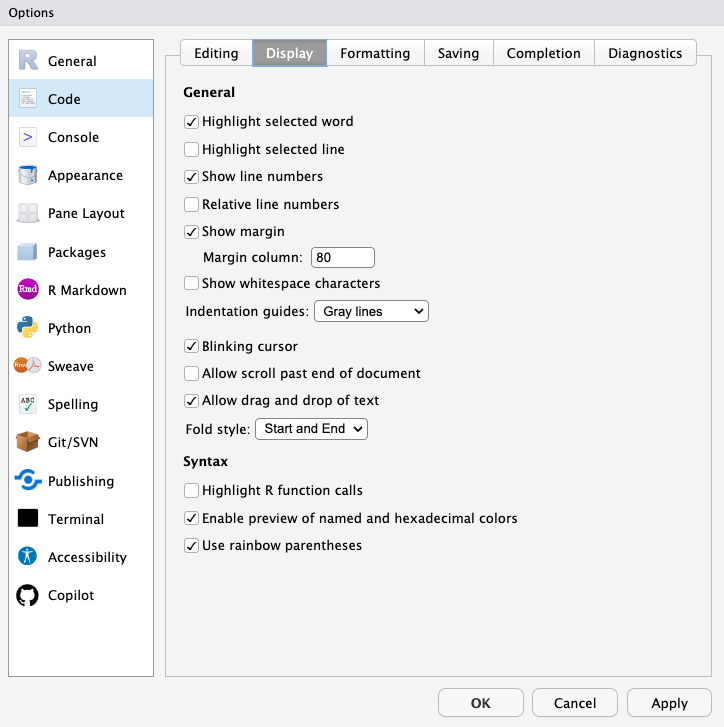
Click apply before moving on!
Change your Markdown settings.
Then, go to the R Markdown tab. Under basic, make sure the following is checked:
- “Soft-wrap R Markdown files” is checked
- “Show output inline for all R Markdown documents” is unchecked
- “Show output preview in:” selection is “Viewer Pane”
- “Show document outline by default” is checked
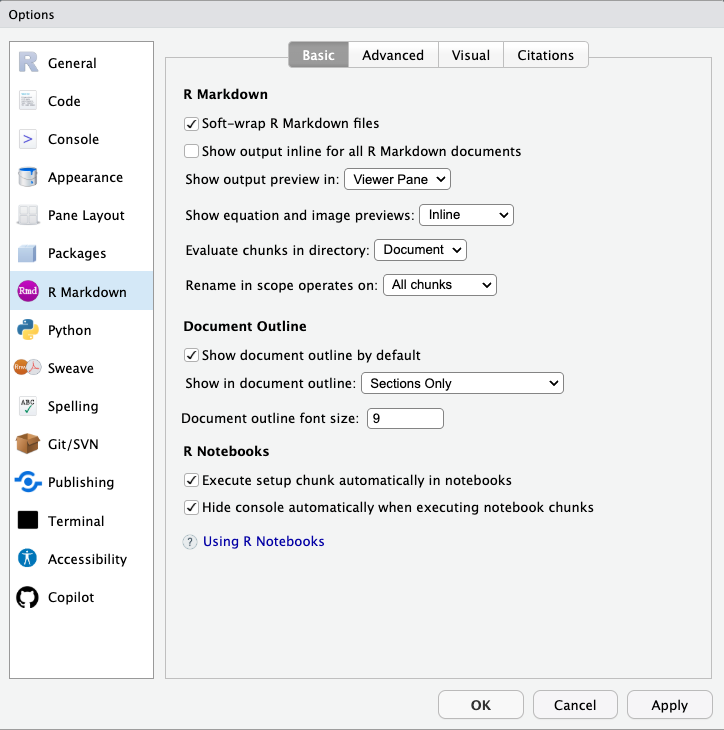
Click apply before moving on!
Change your visual settings.
Under visual (still under the R Markdown tab), make sure:
- “Use visual editor by default for new documents” is unchecked
- “Show document outline by default” is checked
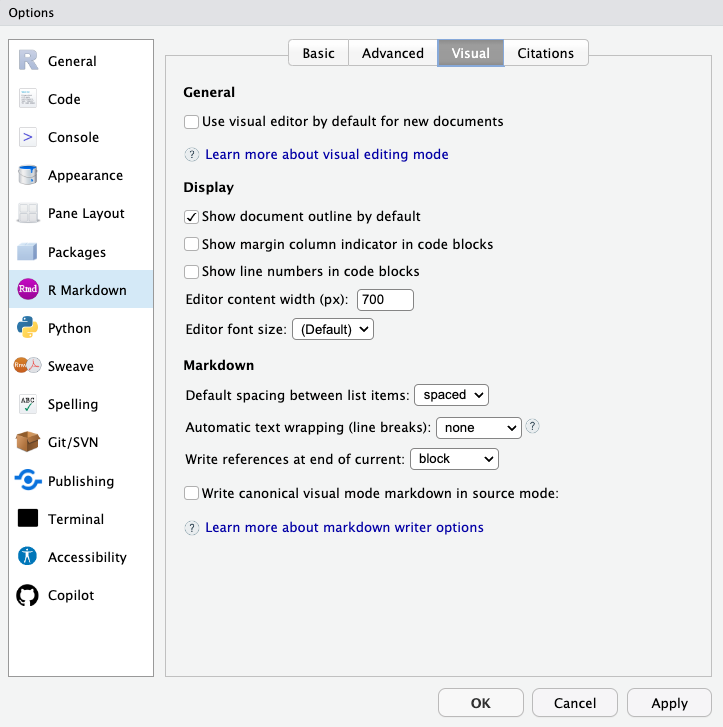
Click apply to save all your changes! Do not move on to the next task without hitting apply!
Task 6. Test out installing a package
Packages are the best part of using R. We’ll talk more about what packages are in workshop, but for now try installing a package. Go to your Console (the bottom left pane in the RStudio window), and type (or copy paste) install.packages("tidyverse"). Hit Enter.
You should get a message that looks something like this:
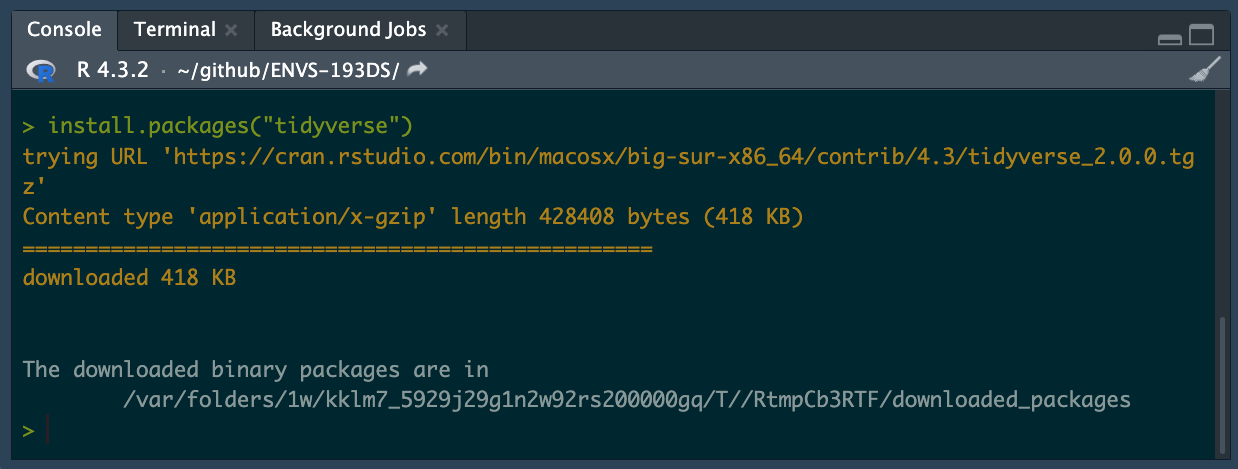
The database that holds all these packages will automatically detect which version you need based on your operating system. Don’t worry if your output message doesn’t look exactly the same as the one here - just as long as you get something like “The downloaded binary packages are in…”, you’ve probably got the package installed.
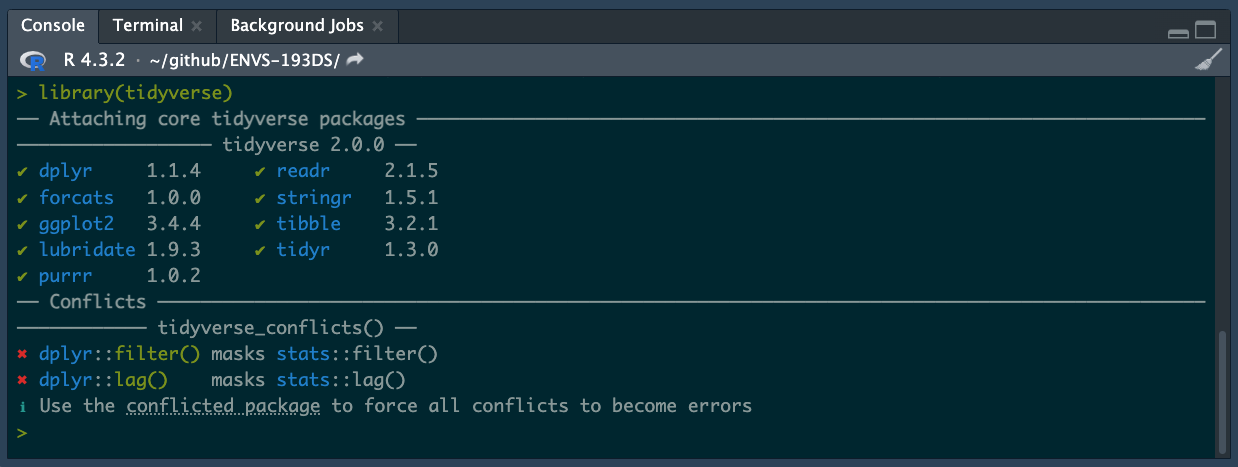
Task 7. Test out reading in a package
Now you’ve installed a package, but you want to make sure you can actually run it. Again in the Console (the bottom left pane), type library(tidyverse) and hit Enter.
You should get a message that looks something like this:
Task 8. Install a small package in the Terminal
In this class, we will use a file format called .qmd to integrate code and plain text into a document.
To use .qmd files and turn them into .pdf files, you will need an additional piece of software.
In the Terminal tab (to the right of the console), type the following:
quarto install tinytex
Hit enter to run that line.
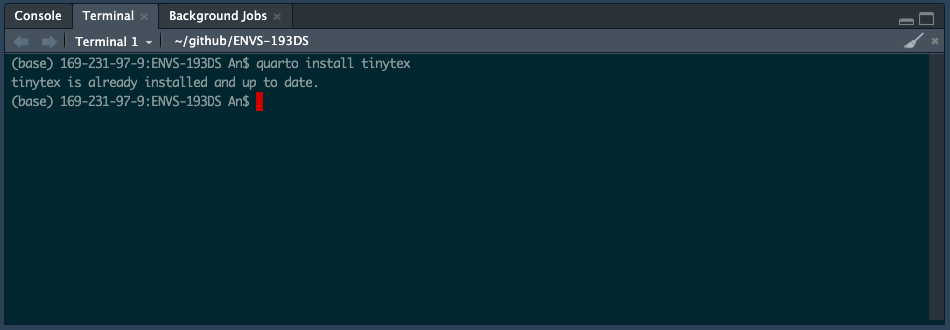
Depending on whether or not you have installed tinytex before, you may see different messages.
On my (An’s) computer, I see the message tinytex is already installed and up to date. You may see a different message, or be prompted to do different things. That is ok!
Task 9. Take a screenshot of your set up.
Take a screenshot of your RStudio window with the Console showing
Your screenshot should look something like this:
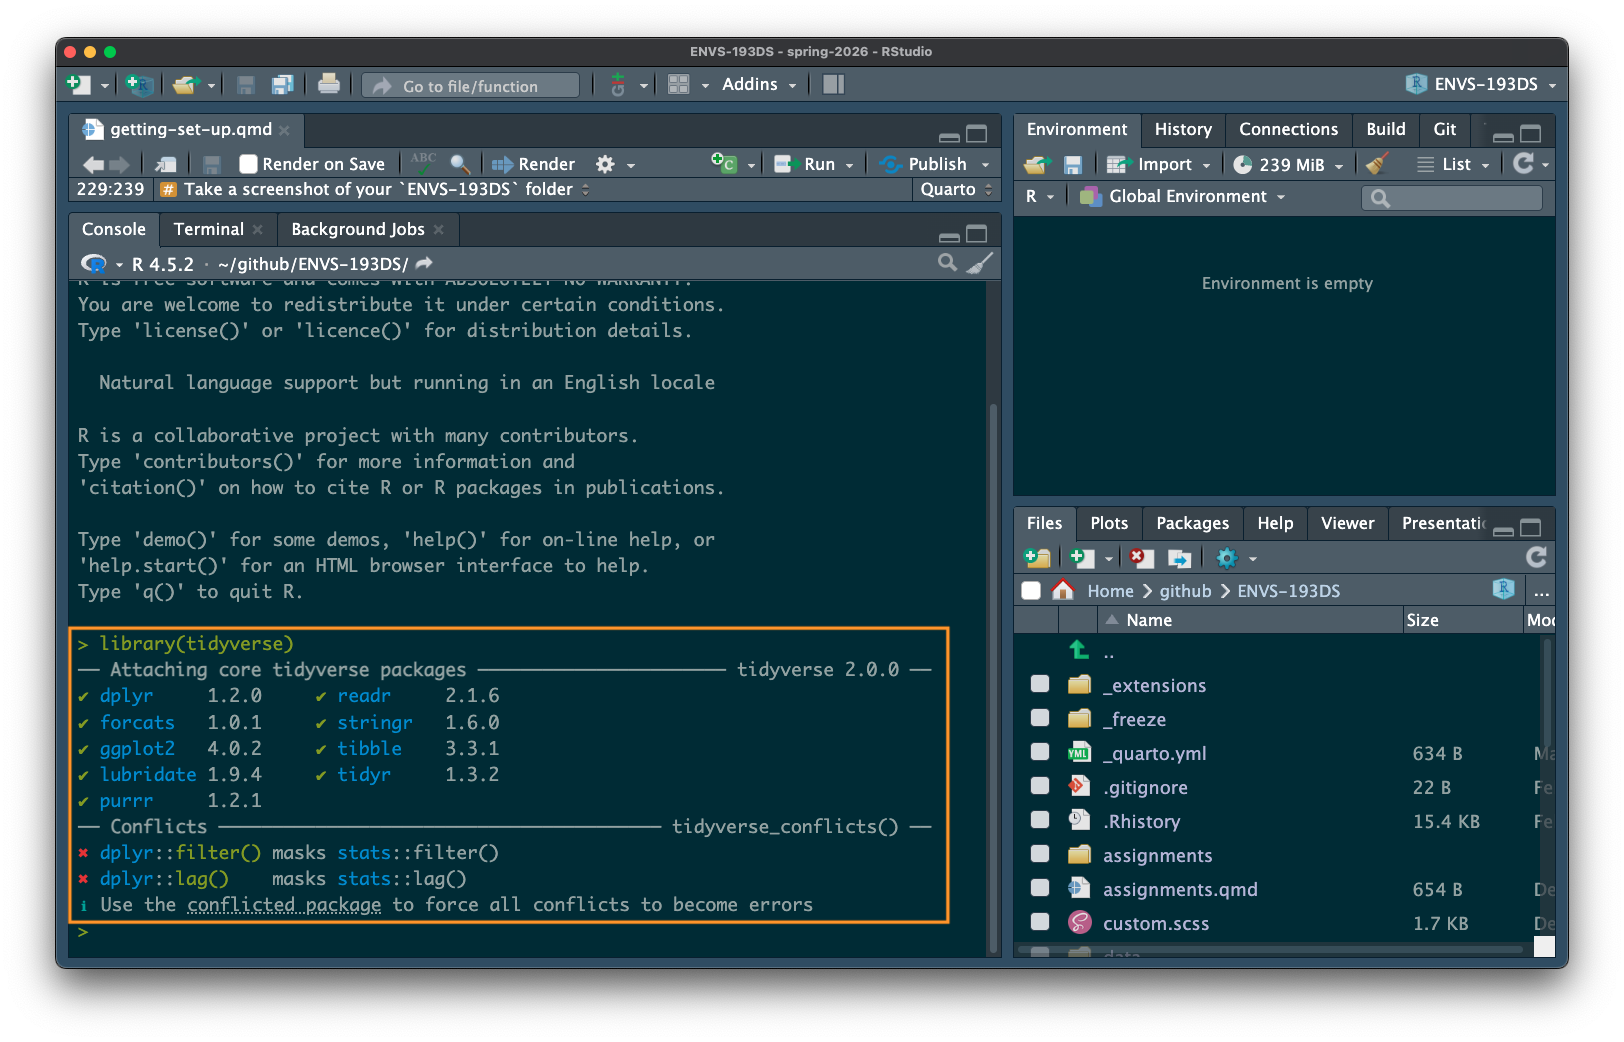
Take a screenshot of your whole RStudio window. Make sure that the messages in the orange box (above) are visible in your screenshot! Otherwise we will not be able to troubleshoot whatever issues you are having with installation (if you are actually having any).
Take a screenshot of your RStudio window with the Terminal showing
Your screenshot should look something like this:
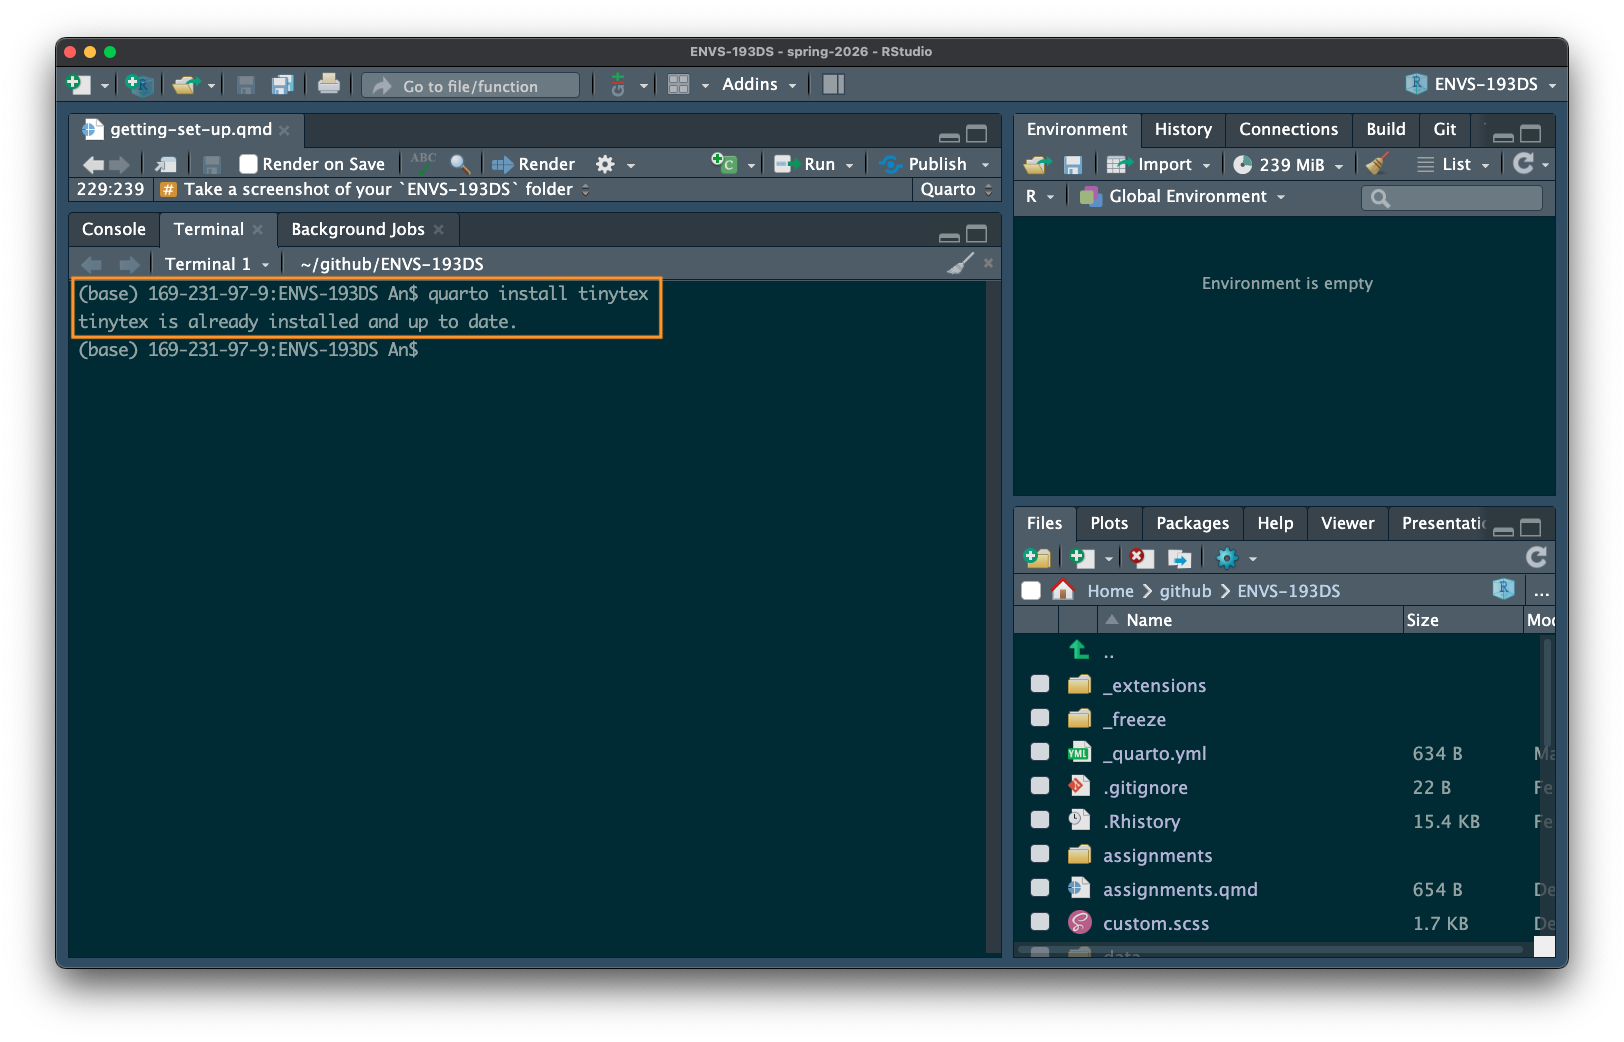
Again, take a screenshot of your whole RStudio window. Make sure that the messages in the orange box (above) are visible in your screenshot! Otherwise we will not be able to troubleshoot whatever issues you are having with installation (if you are actually having any).
Take a screenshot of your ENVS-193DS folder
Lastly, take a screenshot of your ‘ENVS-193DS’ folder set up from task 1. It should be evident what the file path is, either from a path at the bottom of the window or on the side. It doesn’t matter where the file path appears in your screenshot as long as you can tell where the folder is. Your screenshot should look something like this:
Upload all three screenshots to Canvas for your optional check-in.
Triple checking your set up
If you would like to verify your set up with a member of the teaching team (independently of the optional check-in on Canvas), feel free to stop by drop-in hours during week 1.